Creating a truly immersive soundscape on a sub-£500 budget is not about expensive hardware, but about mastering the physics of sound and the psychology of hearing.
- Professional-grade ambisonic tools are available for free, integrating directly into DAWs like Reaper.
- Understanding and treating your room’s basic acoustic problems delivers more impact than buying more speakers.
Recommendation: Start with a headphone-binaural workflow using the free tools outlined in this guide to build your skills before investing in any multi-speaker hardware.
The ambition to craft sound that envelops a listener, that moves beyond the flat plane of stereo, often feels like a pursuit reserved for well-funded studios or academic institutions. For the independent UK musician or sound designer working from a spare room, the perceived cost of entry—specialised microphones, a dozen speakers, and costly software licenses—can seem insurmountable. The common advice often points towards investing in a 5.1 surround sound system or a licensed Dolby Atmos setup, solutions that quickly exhaust a modest £500 budget before even considering the complexities of acoustic treatment.
This approach, however, fundamentally misses the point. The power of spatial audio doesn’t solely reside in the number of speakers you can afford. It’s rooted in a deeper understanding of psychoacoustic immersion and acoustic principles. It’s knowing how to manipulate sound to convince the human brain it’s hearing something in three dimensions, a trick that can be achieved with remarkable fidelity using just a good pair of headphones and the right knowledge. This is not just for VR and gaming; these techniques are at the core of creating compelling audio for gallery installations and spatial music albums.
But what if the key wasn’t spending the budget, but outsmarting it? What if the path to a 360-degree soundscape was less about hardware acquisition and more about mastering a workflow? This guide abandons the expensive, gear-centric narrative. Instead, it provides a technically precise, accessible framework for creating professional-grade spatial audio. We will explore the psychoacoustic ‘why’ behind immersive sound, the practical ‘how’ of encoding it with free tools, how to navigate critical pitfalls like phase cancellation, and the strategic decisions that will define your project’s success, all while keeping your budget firmly intact.
This article provides a complete roadmap, from understanding the core concepts to implementing them in a project. The following sections break down each essential component, offering practical steps and strategic insights to guide your work.
Summary: A UK Artist’s Guide to 360° Soundscapes
- Why Does Binaural Sound Trigger Emotional Responses That Stereo Cannot Match?
- How to Encode Ambisonic Audio in Reaper Without Expensive Plugins?
- Headphone Binaural vs Speaker Surround: Which Format Suits Gallery Installations Best?
- The Mono Collapse Error That Ruins 60% of First Ambisonic Mixes
- When to Release a Spatial Album: Before or After the Physical Installation Opens?
- How to Create a Gallery-Ready VR Environment in Unity Without Writing Code?
- Why Does Your Low E String Boom in One Corner but Disappear in Another?
- Why Do Some Concert Halls Make Your Instrument Sound Better Than Your Practice Room?
Why Does Binaural Sound Trigger Emotional Responses That Stereo Cannot Match?
The profound difference between stereo and binaural audio lies in how they interact with our brain’s innate spatial hearing mechanisms. A standard stereo mix presents sound on a flat, left-to-right axis. Binaural audio, by contrast, simulates the way our ears naturally perceive sound in a three-dimensional world. It encodes crucial spatial cues—subtle time, volume, and frequency differences between what each ear hears—that our brain interprets to locate sounds above, below, behind, and in front of us. This is achieved by using a Head-Related Transfer Function (HRTF), a filter that mimics how our head, torso, and outer ears shape incoming sound waves.
When listening on headphones, this technique bypasses the acoustics of the listening room and delivers these precise cues directly to the ears. The brain, convinced it’s hearing sound in a real space, constructs a detailed and personal soundscape. This creates a powerful sense of psychoacoustic immersion and presence that stereo cannot replicate. This heightened realism can lead to stronger emotional engagement, as sound becomes a tangible element of the listener’s immediate environment. For instance, a 2021 study at the National Science and Media Museum in Bradford, UK, found that visitors engaged more deeply and for longer with exhibits that used spatialised interactive audio, exploring the virtual sound sources attached to physical artefacts.

This emotional connection is not just anecdotal. The verisimilitude of binaural audio has a measurable physiological effect. Research has shown its potential in therapeutic contexts, with one study confirming that over 80% of participants reported improved mood when exposed to the immersive qualities of binaural beats and ASMR triggers. For an artist, this means binaural is more than a technical format; it’s a tool for crafting more intimate, impactful, and memorable experiences.
How to Encode Ambisonic Audio in Reaper Without Expensive Plugins?
The perception that creating ambisonic audio requires a significant financial investment in software is a common misconception. The reality is that a powerful, professional-grade workflow can be built entirely within a flexible Digital Audio Workstation (DAW) like Reaper, using freely available, open-source plugins. The key is the IEM Plugin Suite, a comprehensive set of tools developed at the Institute of Electronic Music and Acoustics in Graz.
As the developers themselves state, this suite is a powerful, no-cost gateway into the world of spatial audio production:
The IEM Plug-in Suite is a free and Open-Source audio plugin suite including Ambisonic plug-ins up to 7th order created by staff and students of the Institute of Electronic Music and Acoustics.
– IEM (Institute of Electronic Music and Acoustics), Official IEM Plugin Suite documentation
Setting up an ambisonic project in Reaper involves a specific routing and plugin chain, but it’s a systematic process. Ambisonics works by capturing a full 360-degree soundfield into a set of audio channels called the B-format. The number of channels determines the spatial resolution, or ‘order’. First-Order Ambisonics (FOA) uses 4 channels, while Third-Order (TOA), a common professional standard, uses 16 channels. The IEM suite makes managing these complex channel counts straightforward. Here is a basic workflow to get started:
- Download and install the free IEM Plugin Suite, which supports formats up to seventh-order ambisonics (HOA).
- Configure your Reaper project for a 16-channel track format to accommodate Third-Order Ambisonics (TOA). The IEM website provides project templates to simplify this setup.
- On individual tracks containing your mono or stereo sound sources, insert the IEM StereoEncoder plugin. This tool acts as your 3D panner, allowing you to place sounds anywhere in the spherical soundfield.
- Route the output of all your encoded source tracks to a central 16-channel « Ambisonic Bus » track.
- On this master bus, insert the IEM BinauralDecoder plugin. This crucial tool converts the 16-channel B-format signal into a standard 2-channel binaural stereo signal for monitoring on any pair of headphones.
- For final delivery, you can export the 16-channel B-format file directly for multi-speaker arrays or use another IEM decoder to export a 4-channel FOA file, which is the standard for platforms like YouTube 360 and game engines like Unity.
Headphone Binaural vs Speaker Surround: Which Format Suits Gallery Installations Best?
For an artist creating a sound installation, the choice between a headphone-based binaural experience and a multi-speaker surround setup is a critical decision with significant artistic and logistical implications. While a room filled with speakers can create a spectacular shared experience, it introduces immense challenges, particularly on a limited budget. The primary obstacle is cost and complexity, as hiring even a modest 12-speaker immersive system for a UK gallery can cost thousands for just a few days, placing it far outside a £500 budget.
Beyond cost, speaker-based installations are highly dependent on the gallery’s acoustics and the listener’s position. The carefully crafted spatial mix can be compromised by room reflections, ambient noise, and the fact that only a small « sweet spot » will experience the audio as intended. Headphones, in contrast, offer a perfectly controlled and consistent delivery system. The binaural mix sounds identical for every visitor, regardless of where they are in the physical space, creating a far more personal and reliable immersive experience. This level of control makes it a superior format for works that rely on subtle spatial details and emotional intimacy.
Case Study: Therapeutic Engagement with Binaural Audio
The power of headphone-based delivery for deep engagement was demonstrated in a 2022 study involving autistic participants with auditory hypersensitivity. Researchers compared their reactions to a VR game using standard stereo audio versus binaural-based spatial audio. The results were clear: the binaural group showed significantly greater reductions in negative emotional reactions to stressful sounds. Crucially, their voluntary interactions with the audio-visual stimuli increased over time, proving that the controlled, personal nature of the binaural experience fostered a greater sense of safety and engagement than a less predictable open-air audio format would have allowed.
Therefore, for the budget-conscious artist, the choice is clear. A headphone-based binaural installation is not a compromise; it’s a strategic decision. It guarantees a high-fidelity, repeatable, and deeply personal experience for every visitor. It eliminates the variables of room acoustics and listener position, requires minimal gallery infrastructure, and allows the entire budget to be focused on what truly matters: the quality of the sound art itself.
The Mono Collapse Error That Ruins 60% of First Ambisonic Mixes
One of the most common and demoralising technical failures in a first ambisonic mix is the ‘mono collapse’ problem. This occurs when a rich, spacious 360-degree mix sounds thin, hollow, or has elements that completely disappear when played back on a mono system. While it seems counterintuitive to worry about mono in an immersive format, it’s crucial because many playback scenarios—from a phone’s single speaker to club PA systems—are still mono. The culprit is phase cancellation, a phenomenon that occurs when two sound waves with opposite polarity are combined.
In a spatial mix, you often use stereo sources or apply stereo-widening effects. If these sources contain out-of-phase information, the left and right channels will cancel each other out when summed to mono. The result is a dramatic loss of volume and frequency content, particularly in the low end. As technical guidance from audio engineers at sonible highlights, audio signals with a stereo correlation value below zero are guaranteed to have components that cancel out when summed to mono. Ignoring this can render your mix unusable in many real-world playback environments.
Ensuring mono compatibility is not an optional final check; it’s a discipline that must be part of the entire mixing process. It requires constant vigilance and a systematic workflow to catch and correct phase issues as they arise. This preventative approach saves hours of troubleshooting and ensures your work translates reliably across all systems, from a multi-speaker gallery installation to a single Bluetooth speaker.
Action Plan: Audit for Mono Compatibility
- Mix with Mono in Mind: From the very start, ensure all critical low-frequency content (typically below 200Hz), such as kick drums and sub-bass, is positioned centrally and is fully mono. Use a utility plugin to collapse the low end of bass instruments to mono.
- Regularly Check in Mono: Use a mono-summing plugin on your master bus and toggle it on and off frequently throughout your mix session. This is the single most effective way to hear phase problems as they happen.
- Use a Phase Correlation Meter: Place a phase meter on your master bus. The needle should consistently stay in the positive range (between 0 and +1). If it frequently dips into the negative (-1 to 0), you have a phase problem that needs fixing.
- Perform a Real-World Test: Before finalising, test your mix on a single, inexpensive Bluetooth speaker (e.g., a £20 model from Argos or Currys). This is the ultimate test of how your mix will translate in the worst-case scenario.
- Resolve Identified Issues: If you detect phase cancellation on a track, try nudging the timing of the left or right channel by a few milliseconds, using a slight detuning effect, or inverting the polarity of one channel to bring them back into alignment.
When to Release a Spatial Album: Before or After the Physical Installation Opens?
For an artist working across both a physical installation and a commercially released album, the question of timing is a crucial strategic consideration. There is no single correct answer; the optimal strategy depends on your primary goals, financial situation, and audience engagement plan. The two main approaches—releasing the album first or premiering the work at the installation—offer distinct advantages and trade-offs.
Releasing the album before the installation opens serves several practical purposes. It acts as a powerful promotional tool, building anticipation and providing a narrative for the press and public ahead of the physical event. It allows listeners to familiarise themselves with the work in an accessible format, potentially enriching their experience when they encounter the full installation. Most importantly for an independent artist, it creates a revenue stream. As noted in discussions among UK artists on spatial audio practices, this is a common and pragmatic approach:
releasing the album first can generate a small income stream to help fund the final, physical build of the installation
– Independent UK artists strategic approach, Spatial audio live performance practices in UK venues
Conversely, holding back the album until after the installation premiere prioritises the physical event as the definitive, « purest » version of the work. This can create a sense of exclusivity and urgency, encouraging attendance. It positions the installation as the primary artistic statement, with the subsequent album release serving as a souvenir or a more widely accessible version of that core experience. This strategy was effectively employed by artist Sadia Sadia for her work ‘Notes to an Unknown Lover’, which was first created as a 30-channel gallery piece before being re-imagined for Dolby Atmos and other formats at Real World Studios in the UK, allowing different audiences to experience the work through distinct, format-specific lenses.
Ultimately, the decision rests on a balance of artistic intent and financial reality. For most independent artists, the « album-first » strategy offers a more practical path, using the digital release to fund and promote the more ambitious and costly physical installation. This creates a sustainable, multi-stage project rather than a single, high-risk event.
How to Create a Gallery-Ready VR Environment in Unity Without Writing Code?
For a sound artist, creating a virtual reality (VR) environment to showcase an ambisonic piece can elevate the work from a purely auditory experience to a fully immersive, interactive one. The prospect of using a game engine like Unity may seem daunting, but it’s entirely possible to build and deploy a simple, gallery-ready VR application without writing a single line of code. The key is to leverage the power of Unity’s user-friendly interface in combination with a dedicated game audio tool like FMOD Studio.
This combination of free-for-indie-developer tools is a well-established workflow for creating immersive experiences. As documented in a 2020 study of audio augmented reality installations in UK museums, the application for one such installation was authored using Unity and FMOD, demonstrating their suitability for professional, public-facing projects. The process involves building a simple virtual space, importing your ambisonic audio, and packaging the result for a standalone VR headset like the Meta Quest 2, a popular choice for its accessibility and ease of use in gallery settings.
By following a structured, no-code workflow, you can create a simple ‘white cube’ gallery space, place your ambisonic soundfield within it, and generate an application that can be easily loaded onto a headset for curators or visitors to experience. This approach provides a powerful and cost-effective way to present your sound art in a context you fully control.
- Install the Tools: Download and install the free personal versions of the Unity Hub and FMOD Studio. Unity is the 3D environment builder, and FMOD is the advanced audio engine that will handle your spatial audio.
- Build a Simple Scene: In Unity, create a new 3D project. Use the built-in ‘Cube’ and ‘Plane’ objects to construct a basic room—a floor and four walls. You can find free textures (e.g., white plaster, concrete floor) on the Unity Asset Store to make it look like a gallery space.
- Prepare Your Audio in FMOD: In FMOD Studio, create a new project and an ‘Event’. Drag your 4-channel First-Order Ambisonic (FOA) .wav file into this event. Add a ‘Spatialize’ effect to the event’s master track and set it to preserve the ambisonic soundfield.
- Integrate FMOD into Unity: In Unity, install the FMOD integration package. This allows Unity to communicate with your FMOD project. Drag your FMOD event from the FMOD browser into your Unity scene. This will create an object that ’emits’ your ambisonic soundscape.
- Set up the VR Camera: Download and import the VR interaction framework for your target headset (e.g., Meta’s XR Interaction Toolkit for Quest 2). Replace the standard camera in your scene with the pre-built VR camera rig. Attach the FMOD Listener component to this VR camera.
- Build and Deploy: In Unity’s Build Settings, switch the platform to ‘Android’ (for Quest). Connect your headset to your computer and click ‘Build and Run’. Unity will compile your scene into an .apk file and install it directly onto the headset for testing.
Key Takeaways
- Psychoacoustics over Hardware: A deep understanding of how binaural audio tricks the brain is more valuable for creating immersion than an expensive multi-speaker setup.
- Free Tools Are Professional Grade: The combination of Reaper and the IEM Plugin Suite provides a complete, no-cost workflow for creating and decoding high-order ambisonic audio.
- Fundamentals Are Non-Negotiable: Mastering room acoustics and ensuring mono compatibility are the two most critical technical skills for producing a successful spatial mix on a budget.
Why Does Your Low E String Boom in One Corner but Disappear in Another?
This frustratingly common experience is the direct result of your room’s acoustic properties, specifically a phenomenon known as standing waves or room modes. In any enclosed space, sound waves reflect off surfaces. At certain frequencies—determined by the room’s dimensions—the reflected wave perfectly aligns with the original wave, creating areas of intense pressure (a ‘boom’ or peak) and areas where they cancel each other out (a ‘suck-out’ or null). This is especially problematic for low frequencies, which have long wavelengths that correspond neatly to the dimensions of a typical small room.
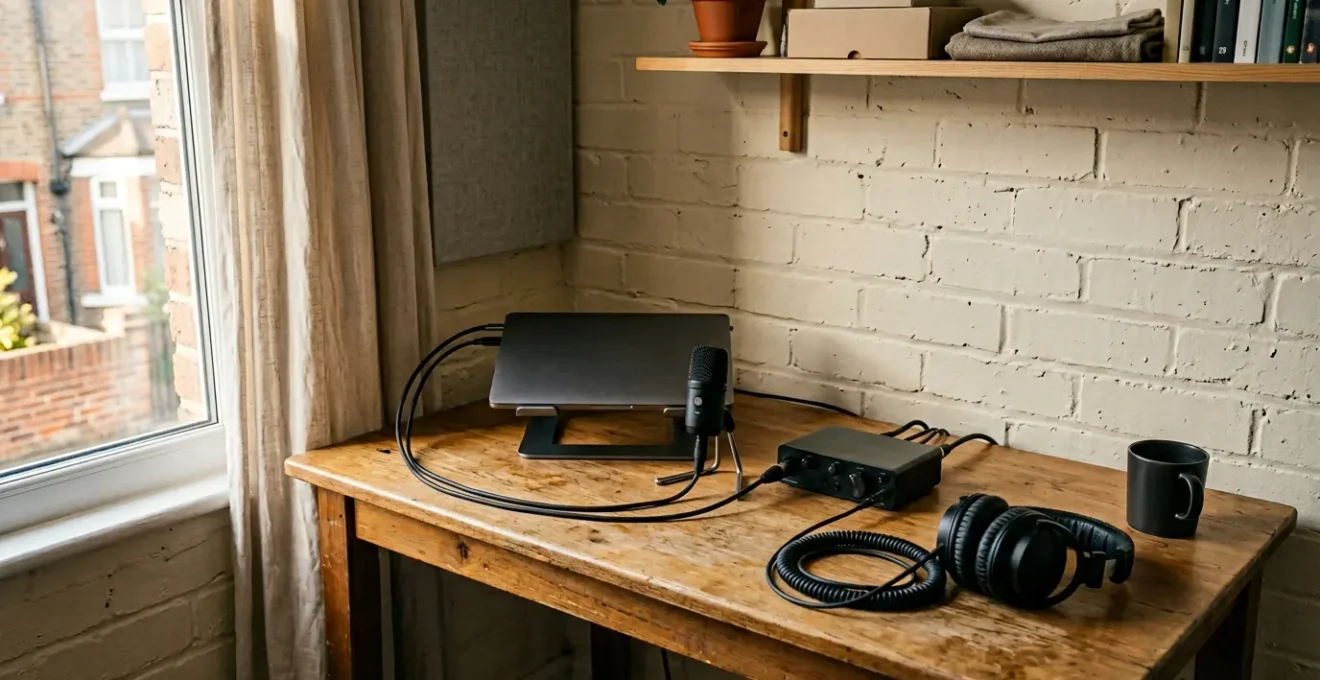
For a sound artist working in a typical UK house’s ‘box room’ studio, often a small rectangular space with solid brick walls, these issues are predictable and severe. A 2.5m x 3m room will have major standing wave issues that directly interfere with the fundamental frequencies of bass instruments and male vocals. When you’re trying to make critical mixing decisions for a spatial audio piece, these acoustic distortions make it impossible to judge bass levels accurately. What sounds balanced in the listening position might be overwhelmingly boomy in one corner and completely absent in another.
Tackling room acoustics doesn’t have to mean spending your entire budget on expensive pre-made panels. A significant improvement can be made with less than £100 by focusing on the most critical issue in small rooms: low-frequency absorption. By applying some basic acoustic principles and using affordable DIY materials, you can dramatically reduce the impact of room modes and create a more reliable mixing environment.
- DIY Bass Traps: The most effective solution is to treat the corners, where bass frequencies build up the most. Build simple frames and fill them with high-density rockwool, available from UK retailers like B&Q for around £30-50. Cover them with a breathable fabric.
- Use Existing Furniture: A fully-stocked bookshelf acts as an excellent diffuser, breaking up sound reflections. Repurposing existing furniture costs nothing and is highly effective at scattering mid and high frequencies.
- Improvised Absorbers: For reducing general echo and mid-frequency reflections, hanging heavy duvets or thick, dense curtains (available from stores like Wickes for £20-40) on walls can act as effective temporary broadband absorbers.
- Measure, Don’t Guess: Use the free REW (Room EQ Wizard) software with a basic measurement microphone (like the Behringer ECM8000, ~£35). This allows you to see exactly which frequencies are a problem in your room, so you can target your treatment effectively.
- Find the Optimal Position First: Before you treat anything, use REW to map the bass response around the room. Moving your desk and listening chair just 30cm forward or backward can sometimes place you in a ‘null’ for a problematic mode, providing a significant improvement for free.
Why Do Some Concert Halls Make Your Instrument Sound Better Than Your Practice Room?
The stark contrast between the rich, supportive sound of a great concert hall and the often cramped, unflattering sound of a home practice room comes down to professional architectural acoustic design. Venues like London’s Royal Albert Hall or Manchester’s Bridgewater Hall are not just large; they are meticulously engineered instruments in their own right. Their design controls two key acoustic factors: reverberation time (RT60) and early reflections.
A great hall has a long but controlled reverberation time, allowing notes to bloom and blend musically. Its surfaces are a careful mix of absorptive, reflective, and, crucially, diffusive materials. Non-parallel walls, curved ceilings, and textured surfaces break up sound waves, preventing the harsh, fluttering echoes and boomy standing waves that plague small, rectangular rooms with parallel walls. This rich, complex pattern of reflections adds a sense of space and warmth that makes an instrument sound full and dynamic. Your small practice room, by contrast, typically has a very short, uncontrolled reverberation time and strong, direct reflections that cause colouration and comb filtering, distorting the instrument’s natural timbre.
While you cannot replicate the architecture of a concert hall, you can digitally capture its acoustic fingerprint and apply it to your own recordings. This is done using convolution reverb, a process that uses an ‘impulse response’ (IR)—a recording of a space’s reaction to a short, sharp sound—to recreate its reverberant qualities. By loading a high-quality ambisonic IR of a concert hall into a convolution reverb plugin, you can place your dry, home-recorded audio within that virtual space with stunning realism.
Remarkably, you don’t need to purchase expensive libraries of these impulse responses. There are free resources available that provide access to professionally recorded spaces.
The Open Air Library is a free collection of Ambisonic (and stereo) Impulse Responses to use with a convolution reverb
– Spatial Media Lab, Free resources for spatial audio production
Using these free ambisonic impulse responses is the final piece of the puzzle. It allows you to bridge the gap between your acoustically-treated-but-still-small home studio and the vast, beautiful acoustics of a world-class performance space. It’s the ultimate budget-friendly tool for adding professional scale and polish to your spatial audio mixes, transforming a dry recording into an immersive experience.
Begin experimenting today. Download the free IEM plugins and the Open Air Library impulse responses, and start transforming your home studio recordings into truly immersive 360-degree soundscapes.