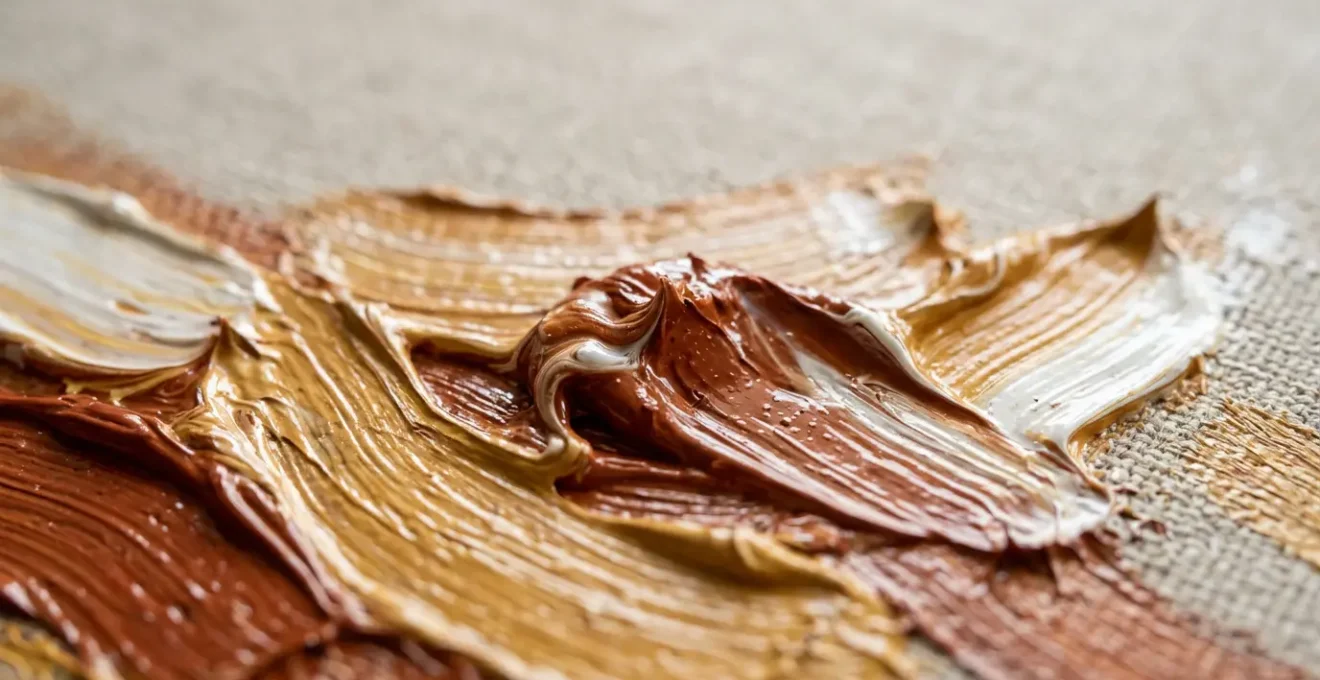
The vibrant texture of a master’s impasto is not a result of simply applying thick paint, but a deliberate act of material engineering.
- Muddiness is an optical problem: uncontrolled, diffuse light reflection from a poorly structured paint film makes it appear dull.
- Luminosity comes from structural integrity: using the right mediums and respecting chemical drying stages creates a stable surface that reflects light with intention.
Recommendation: Stop thinking like a painter and start thinking like a material scientist—control your pigment-binder ratios and build your impasto in structurally sound, chemically compatible layers.
For any dedicated oil painter, the frustration is palpable. You stand before a Rembrandt or a Van Gogh, mesmerized by the sheer physicality of the paint. The impasto is not just thick; it’s alive with light, each ridge and furrow catching the eye with a brilliance that seems impossible to replicate. Back in the studio, you load your brush, you build up the surface, but the result is a dull, heavy mass. The texture is there, but the luminosity is gone, leaving a surface that looks more like mud than a masterpiece. You’ve followed the common advice—use more paint, add a medium, work with a knife—yet the secret remains elusive.
The conventional wisdom often misses the point entirely. The problem isn’t a lack of paint or a failure of artistic technique. It is a failure to understand the materials themselves. The difference between a muddy passage and a luminous one lies in the physics of light and the chemistry of the paint film. An Old Master was, by necessity, a material scientist, manipulating lead, oil, and minerals to create a specific optical effect. Their impasto was engineered to reflect light, not just to create texture.
This is where we must shift our perspective. The key to unlocking luminous impasto is not in a secret technique, but in a deeper understanding of how the paint functions as a physical, chemical, and optical structure. It’s about controlling the polymerization of oils, understanding pigment-binder interactions, and building a paint film that will remain stable and vibrant for centuries. This is the conservator’s view, one that deconstructs the artwork to its material components to understand how it was made and why it survives.
This guide will walk you through the core principles of this material-first approach. We will dissect the science behind light reflection, the proper methods for layering, the chemical properties of different mediums, and the fatal errors that lead to cracking and dullness. By the end, you will have the knowledge to build texture that is not just thick, but structurally sound and optically brilliant.
Summary: From Muddy Texture to Luminous Impasto: A Material Science Breakdown
- Why Does Thick Paint Absorb Light Instead of Reflecting It in Amateur Work?
- How to Layer Impasto Over 3 Sessions Without Cracking or Sinking?
- Cold Wax vs Alkyd Medium: Which Holds Knife Marks Better After 6 Months?
- The Drying Rule Violation That Destroys 80% of Heavy Impasto Paintings Within 2 Years
- When Is Oil Paint Too Dry to Blend but Perfect for Knife Work?
- Deconstructing a Master’s Impasto: The Material Science Behind Rembrandt’s Texture
- The Physics of Light on a Painted Surface: Specular vs. Diffuse Reflection for Maximum Luminosity
- Pigment Properties and Their Impact on Impasto: A Material Guide
Why Does Thick Paint Absorb Light Instead of Reflecting It in Amateur Work?
The core reason amateur impasto often looks muddy is a misunderstanding of light physics. A luminous surface is one that controls how light reflects off it. When light hits a painted surface, it can either scatter in many directions (diffuse reflection), creating a matte, dull appearance, or it can reflect back at a consistent angle (specular reflection), creating bright, clear highlights. The chunky, overworked, or poorly formulated impasto of an amateur painter creates a chaotic surface full of microscopic pits and inconsistencies. This traps light and causes it to scatter diffusely, resulting in a surface that absorbs luminosity rather than projecting it.
The goal is to create intentional surface geometry. The relief of a brushstroke or knife mark is not just texture; it is a landscape designed to manage light. Old Masters understood this intuitively. They built surfaces with rounded, convex forms that would generate crisp specular highlights, making the paint appear to glow from within. Scientific analysis confirms this; research shows that the relief of impasto increases its perceptibility by enhancing its light-reflecting properties. A muddy surface is simply one where the texture is random and self-defeating from an optical standpoint.
Furthermore, the binder itself plays a critical role. If the pigment-to-oil ratio is off, or if the medium is too absorbent, the paint surface will be « sunken » and matte, preventing any chance of specular reflection. The light penetrates the surface but does not reflect back with intensity. True luminosity requires a robust, continuous paint film where the pigment is properly encapsulated by the binder, creating a smooth, non-porous surface at the micro-level, even on a highly textured passage.
How to Layer Impasto Over 3 Sessions Without Cracking or Sinking?
Building a heavy impasto over multiple sessions is a structural engineering challenge. The most common failures—cracking and « sinking-in »—occur when painters violate the principles of paint film construction. Sinking-in happens when a fresh, oil-rich layer is applied over a porous, absorbent underlayer. The fresh oil is wicked away into the layer below, leaving the new pigment underbound, matte, and dull. Cracking, on the other hand, is a result of shear stress between layers drying at different rates or a brittle paint film on a flexible support.
The solution lies in a methodical, patient approach that respects the chemical polymerization of the oil. Oil paint does not « dry » by evaporation; it cures through a chemical reaction with oxygen, forming a solid polymer network. This process has stages. Applying a new layer before the one beneath has sufficiently cured creates a weak, unstable structure. The key is to build a rigid foundation and ensure each new layer can properly adhere without compromising the layers below.
To avoid these issues, painters must manage the absorbency and structural integrity of each successive layer. This involves using faster-drying, more rigid mediums in the initial layers and potentially « oiling out » sunken passages to restore a non-absorbent surface before adding more paint. This re-saturates the colors and provides a stable platform for the next application, ensuring the new layer’s oil remains where it belongs: binding the pigment and creating a luminous film.
Action Plan: Building Stable, Multi-Session Impasto
- Build a rigid under-structure: Use an alkyd or calcite/marble dust medium in the first session to create a fast-drying, structurally sound foundation that supports subsequent oil-rich layers.
- Restore sunken layers: Before the next session, apply a thin layer of retouch varnish or use an « oiling out » technique (a very thin coat of medium) to restore luminosity to matte passages and create a non-absorbent surface.
- Respect polymerization stages: Wait for the paint to move beyond the « touch dry » surface skin to a structural cure. The film must be firm enough to accept new layers without the pressure of a brush or knife causing shearing or mixing.
- Use a rigid support: Apply heavy impasto exclusively on well-stretched, heavy-duty canvas or, ideally, on rigid panels. This prevents support-induced shear stress from humidity changes, which causes brittle paint films to crack.
Cold Wax vs Alkyd Medium: Which Holds Knife Marks Better After 6 Months?
The choice of medium is a critical act of material engineering that dictates the final texture and long-term stability of impasto. Alkyd and Cold Wax mediums are popular choices for building body, but they have fundamentally different properties that affect how they hold marks. An alkyd resin is a synthetic polymer that accelerates the oil paint’s oxidative curing process, creating a hard, glossy, and somewhat self-leveling film. Cold Wax medium, a mixture of beeswax and a solvent, does not chemically accelerate drying but acts as a plasticizer, creating a shorter, more buttery paint consistency.
For holding sharp, crisp knife marks, Cold Wax Medium is generally superior. Its physical properties create what is known as a « short » paint. This means the paint breaks cleanly from the tool, retaining sharp peaks and intricate textures without slumping. As the experts at Gamblin note in their technical guide:
Cold Wax Medium has a ‘short’ characteristic and gives a clean break off of the brush or knife, retaining the sharp peaks of impasto.
– Gamblin Artists Colors, Cold Wax Painting Technical Guide
This image provides a clear visual distinction between the two textures after curing. The wax-based medium maintains the sharp, sculptural quality of the knife work, while the alkyd shows a slightly softer, more rounded effect.
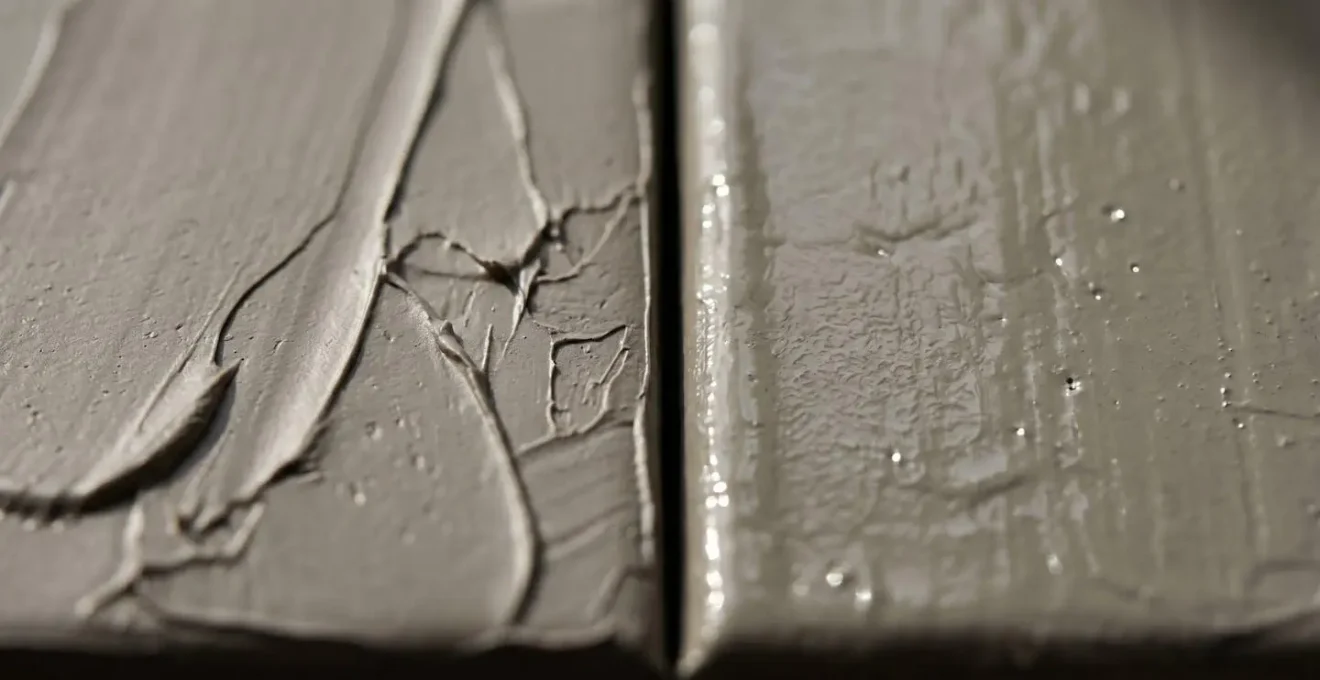
Alkyds, by contrast, form a tough, inflexible film. While they dry quickly, their tendency to level slightly can soften the sharpest edges of a knife mark over time. After six months, an alkyd-heavy impasto will be extremely durable and glossy but may have lost the delicate, high-frequency texture. A cold wax passage will retain that initial mark-making fidelity, offering a distinctively matte or satin finish. The choice, therefore, depends on the artist’s intent: gloss and durability (alkyd) versus textural sharpness and a matte finish (cold wax).
The Drying Rule Violation That Destroys 80% of Heavy Impasto Paintings Within 2 Years
The single most destructive violation in oil painting is ignoring the « fat over lean » rule, but its true meaning is often misunderstood. It is not just about adding more oil to upper layers; it is a principle of structural mechanics. A « lean » layer is one that is less flexible and faster drying (less oil or a fast-drying medium). A « fat » layer is more flexible and slower drying (more oil). Placing a fast-drying, brittle layer on top of a slow-drying, flexible one is a recipe for disaster. The top layer will harden and crack as the layer beneath it continues to shift, shrink, and cure.
This problem is massively amplified in heavy impasto. A thick underlayer can take months or even years to fully polymerize, even if it feels « touch dry » in a few days. Applying a leaner or faster-drying topcoat over this still-active chemical process creates immense internal stress within the paint film. As the entire structure ages and becomes more brittle, these stresses inevitably resolve themselves through cracking.
The choice of pigment can also create a hidden violation. Certain pigments, like Zinc White (PW4), are known to form extremely brittle paint films over time. Using it in thick underlayers, even with a proper medium, creates a permanent structural weakness. Conservation scientists have long warned that zinc oxide promotes the formation of metallic soaps, leading to delamination and severe cracking. An improperly prepared ground layer that is too absorbent or inflexible can also cause disfiguring cracks as the entire painting system expands and contracts with environmental changes, adding further strain to an already fragile structure.
When Is Oil Paint Too Dry to Blend but Perfect for Knife Work?
The transition from a workable, blendable paint film to one that is set enough for sharp, textural knife work is not a single moment but a window of opportunity. This « tacky » or « set » stage is the sweet spot for many impasto techniques. It occurs when the oil paint has begun to polymerize enough to have some internal structure but has not yet formed a hard, impenetrable skin. At this point, the paint will resist being smoothly blended into adjacent colors but has enough plasticity to be shaped and carved with a knife, holding a crisp edge without smearing.
This window varies dramatically based on two factors: the pigments used and the medium added. Pigments have different oil absorption rates and catalytic effects on drying. Earth colors like Burnt Umber are notoriously fast driers because the manganese they contain acts as a catalyst for polymerization. Pigments like Titanium White or Ivory Black are slow, leisurely driers. Therefore, a passage of Burnt Umber will reach the « set » state hours or even days before a passage of pure Titanium White painted at the same time.
An artist can strategically exploit this phenomenon. By painting a foundational layer with fast-drying earth tones, one can return to the canvas sooner to apply crisp knife marks or scumble dry-brush textures over the tacky surface. Understanding your palette’s drying properties allows for meticulous planning of layering and textural effects. Adding a fast-drying alkyd medium can shorten this window to less than 24 hours, while using a slow-drying oil like poppy oil can extend it for days, offering more time for wet-into-wet blending but delaying the opportunity for sharp, sculptural work.
Deconstructing a Master’s Impasto: The Material Science Behind Rembrandt’s Texture
To understand luminous impasto, we must look to the master who perfected it: Rembrandt. For centuries, the unique, glowing quality of his textured passages was attributed to mysterious techniques. However, modern conservation science has revealed the secret was not a technique, but a specific and intentional act of material engineering. Analysis of his paint has uncovered a secret ingredient that modern tube paints lack by default.
This image shows the characteristic consistency of traditional lead white, the cornerstone of Rembrandt’s impasto. It possesses a unique « ropy » and slightly translucent quality, unlike the opaque, buttery feel of modern titanium white.
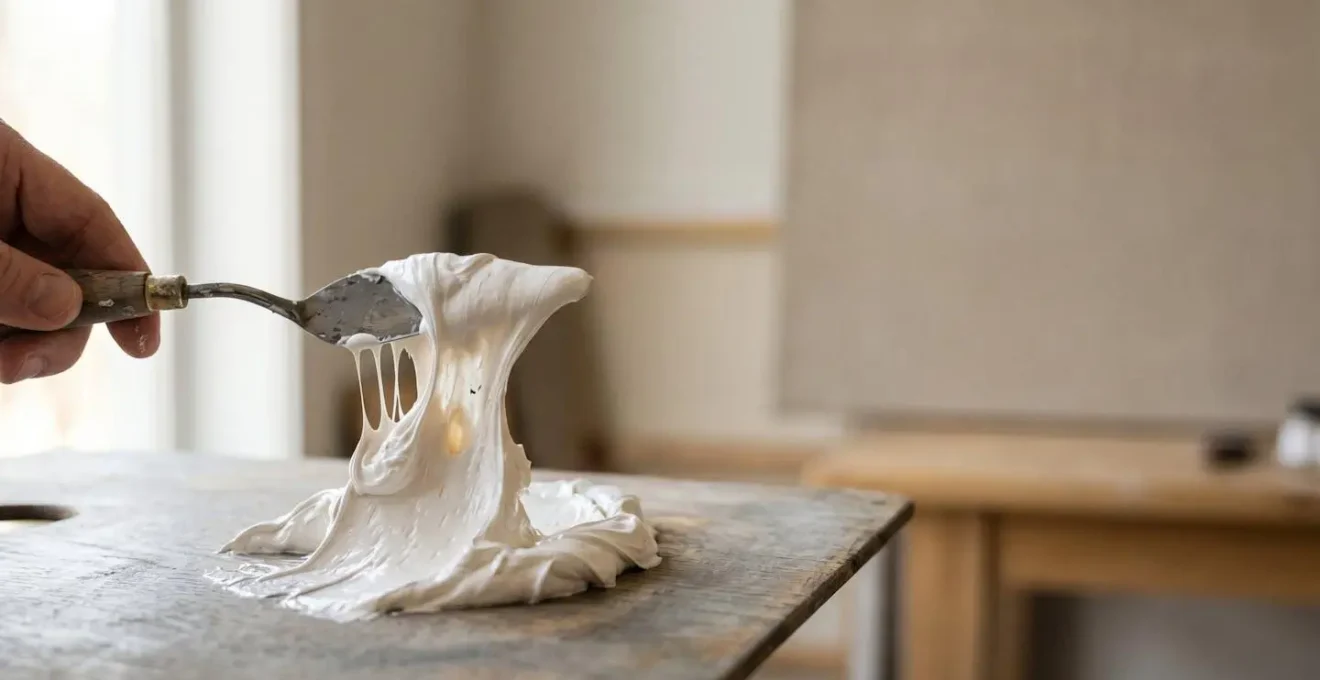
The key discovery was the presence of a rare lead carbonate mineral called plumbonacrite. As research published in Angewandte Chemie confirms, plumbonacrite was detected in the impasto areas of multiple Rembrandt masterpieces. It is not a naturally occurring component of traditional lead white pigment. This proves Rembrandt intentionally synthesized it by adding lead oxide to his oil binder, creating a mildly alkaline environment. This modified binder resulted in a paste-like paint that was not only thick but had superior handling properties and, crucially, unique optical qualities. This special formulation enabled the paint to hold sharp peaks while also having a subtle translucency that contributed to the famous « glow. »
This is the fundamental difference: Rembrandt was not just using thick paint; he was using chemically modified paint. He engineered his materials to achieve a specific structural and luminous effect. This is a lesson for the modern painter: to replicate such effects, we cannot rely on paint straight from the tube but must become material scientists in our own right, using mediums and additives to modify our paint’s fundamental properties.
The Physics of Light on a Painted Surface: Specular vs. Diffuse Reflection for Maximum Luminosity
The perceived « luminosity » of a painting is a direct result of how its surface geometry interacts with light. As discussed, there are two primary types of reflection: specular and diffuse. A perfectly smooth, glossy surface (like a mirror or calm water) produces almost pure specular reflection, creating a clear, sharp reflection of the light source. A perfectly matte, rough surface (like uncoated paper or a concrete wall) produces diffuse reflection, scattering light in all directions and appearing evenly lit with no distinct highlights. Muddiness is the result of uncontrolled diffuse reflection.
Luminous impasto is achieved by creating a surface that generates a controlled mixture of both. The broad, flat planes of a paint stroke might produce diffuse reflection, giving the color its body and presence. However, the ridges and peaks of the impasto are engineered to produce sharp specular highlights. These bright points of light trick the eye into perceiving the entire passage as more brilliant and dynamic. The three-dimensional relief of the paint becomes an optical tool.
Scientific analysis of impasto demonstrates this principle in action. The rounded, convex shapes of well-executed brushstrokes act like tiny lenses, catching and focusing light into bright specular points. Conversely, passages that have been flattened, overworked, or blended into a uniform roughness lose this ability. They create a chaotic surface that scatters light diffusely, appearing dull and lifeless. The key, therefore, is not just to create texture, but to create a specific kind of texture—one with intentional, light-catching geometry. This is why a single, confident knife stroke often appears more brilliant than a dozen agitated brush marks.
Key Takeaways
- Luminosity is engineered, not accidental. It relies on controlling the optical properties of the paint film through its chemical and physical structure.
- The « fat over lean » rule is a principle of mechanical flexibility. Violating it creates internal stress that will inevitably lead to cracking, especially in thick applications.
- Pigments are not just colors; they are active chemical ingredients that dramatically affect drying time, film brittleness, and handling properties.
Pigment Properties and Their Impact on Impasto: A Material Guide
The final piece of the puzzle lies in the pigments themselves. Each pigment is a unique chemical compound with distinct physical properties, and its interaction with the oil binder is the single most important factor in determining the paint’s behavior. A critical property is the Oil Absorption Index, which measures how much oil is required to fully wet 100g of a given dry pigment to form a usable paste. This ratio dictates the paint’s natural consistency, drying time, and long-term stability.
Pigments with low oil absorption, like traditional Lead White, require very little oil. This results in a dense, lean paint that is naturally suited for thick application and holds its shape beautifully. Conversely, pigments with very high oil absorption, like Phthalo Blue or Raw Sienna, require a large amount of oil. This makes them naturally more fluid and slower drying. To use them for impasto, they must be modified with mediums or fillers to give them body and prevent them from becoming overly oily and prone to wrinkling as they dry.
This table, based on data from technical analysis of pigment-to-oil ratios, illustrates how dramatically these properties can vary and provides a guide to their suitability for impasto work.
| Pigment (Color Index) | Oil Absorption (g oil/100g pigment) | Impasto Suitability |
|---|---|---|
| Lead White (Traditional) | 12-15 | Excellent—naturally suited for thick application, ropy consistency |
| Titanium White (PW6) | 15-22 | Good with medium—can appear chalky when thick without oil enrichment |
| Zinc White (PW4) | 14-16 | Poor—brittle, prone to cracking in impasto |
| Burnt Umber (PBr7) | 45-55 | Requires more medium—fast drying aids impasto structure |
| Raw Sienna (PBr7) | 40-50 | High absorption; needs oil enrichment to prevent cracking |
| Phthalo Blue (PB15:3) | 50-70 | Smooth, buttery—holds sharp peaks with proper medium |
Furthermore, some pigments have known defects in oil. As mentioned, Zinc White is notoriously brittle. Other pigments can have unexpected reactions. Research from conservators has shown that certain pigments, like Cadmium Red, can be prone to « selective cracking » due to poor interaction with specific binders, especially in thick layers. Understanding your pigments not just as colors but as active chemical agents is the hallmark of a true master of materials.
By shifting your focus from pure technique to the underlying material science, you can finally move beyond muddy, lifeless texture. Engineering your paint film with an understanding of its optical properties, structural mechanics, and chemical composition is the definitive path to achieving the stable, luminous, and breathtaking impasto you see in the works of the Old Masters.